Rails are one of the most important and, at the same time, most stressed elements of the railroad transport and metropolitan, since they are particularly exposed to the loading caused by the rolling stock as well as the dynamic loading. Due to the increased speed of the trains for the last years, and the increment loading of the freight cars, the development of service, fatigue-type defects in the place of contact of the train wheel with the rail head surface may occur. These are so-called “Rolling contact fatigue” (RCF) defects.
Application of the EDDY CURRENT FLAW DETECTOR ETS2-77 for detection of surface defects Rolling contact fatigue type in rails
INTRODUCTION
Rails are one of the most important and, at the same time, most stressed elements of the railroad transport and metropolitan, since they are particularly exposed to the loading caused by the rolling stock as well as the dynamic loading. Due to the increased speed of the trains for the last years, and the increment loading of the freight cars, the development of service, fatigue-type defects in the place of contact of the train wheel with the rail head surface may occur. These are so-called “Rolling contact fatigue” (RCF) defects.
One of the defects type appearing at the place of contact of the wheel flange with the rail head gauge face is called “Gauge corner checking”. The area which is the most exposed to damages is the gauging face of the external rail located in curves.
In order to execute the maintenance and service works of the track in more cost-effective manner, the defects detection like Gauge corner checking shall be performed at the early development stage so to eliminate damages afterwards through the grinding procedure, whereas the untimely removal of the defects may cause the growth of the them and further complete breaking of the.
The task that is mentioned above can be successfully solved in case of the eddy current equipment application which in turn not only can detect the flaws of this type, but also effectively evaluate the stage of a damage.
GENERAL KNOWLEDGE
Rolling contact fatigue
The term «Rolling contact fatigue» is a general one and it is used for description of a range of defects which are mainly connected with the development of the overstress of shift at the interface of the wheel with the rail.
One of the RCF defect types is Gauge corner checking. These defects develop on the gauging face of the rail head and represent a series of cracks located at a distance of 2-5 mm one from another, and can have 2 to 5 mm depth and an angle at which they develop in depth—from 10º to 30º.


Figure 1 — Gauge corner checking type defects
The way of evaluation of the depth of the rail head vertical damage (Gauge corner checking)
In order to evaluate the depth of a vertical damage the eddy current method of testing is applied. This technique refers to the electromagnetic ones and is based on the analysis of interaction between the changing electromagnetic field formed by the ECP and the eddy currents formed in the surface layer of the part in question.
Thus, analyzing the eddy currents changes caused by the surface defects, we can evaluate the depth of the rail head vertical damage.
Considering the fact that if the flaws are present, eddy currents propagate along them, the possibility to assess the Gauge corner checking arises.
Vertical crack depth evaluation is conducted with regards to that fact that an angle of the crack development shall be recorded for the calculations, and the following formula is used:

Figure 2 — Illustration of the Gauge corner checking type defect
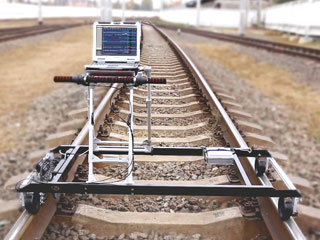
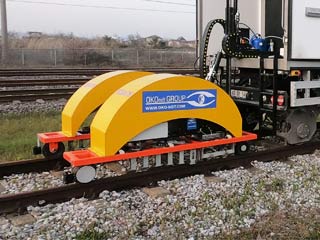
To solve the task of RCF defects detection two scanners are implemented in the design of the flaw detector. One scanner is designed for the Gauge corner checking detection, appearing on the gauging surface of the rail head, and the other scanner–for the Running surface checking appearing on the running surface of the area concerned.

Figure 3 – Rail flaw detector ETS2-77

Figure 4 – Two independent scanners and 8 ECPs of the ETS2-77 flaw detectors
Use of two independent scanners and of 8 eddy current probes (ECP) enabled to assure the test area of 48 mm width.
4 ECPs of the scanner for the rail head gauging face testing are fixed with blocking of the probe’s sensitive areas, meanwhile 4 ECPs of the scanner for the rail head running surface testing—adjustable, with variable positions.
For the operator’s convenience, the scanners of the ETS2-77 flaw detector have two positions:
working (1) when the ECPs are connected to and
transporting (2) when the ECP is removed from the rail.
The application of the ETS2-77 flaw detectors allows to carry out the testing both of the track and the track switches at a speed range of 0.3 to 2.5 m/s.

Figure 5 – Inspection of the track segment for Gauge corner checking
In order to assess vertical damage depth, the ETS2-77 flaw detector’s software has been provided with a wide range of features for the operator’s comfort which includes:
input of a service information (tested segment of the railroad, left or right rail, path coordinate, operator etc)
positioning of the markers allowing to set the correlation between the results and the path coordinates and to facilitate the data analysis interpreting
change of the crack angle both during the testing and while performing the results analysis
automatic depth calculation of the vertical damage in the detected defect
saving of the “raw” results from the tested railway segments
test protocols output for printing.

Figure 6 — Testing of the rail head in process on the railroad track/ ETS2-77 application on the railroad track


Figure 7 — Testing of the rail head in process at the metropolitan/ETS2-77 application at the metropolitan
CONCLUSION
Application of the eddy current scanners for the rail head testing of the railroad and metropolitan will enable not only to detect the RCF type defects, but also to evaluate the depth of the vertical damage of the same. Use of this information will allow to perform the rail grinding more effectively contributing to the surface defects elimination. Moreover, detection of the flaws at the early stage of their development will allow to significantly decrease the removable layer of the rail surface, thus extending their service life, and, as a result–to create a positive effect on the economical aspect of the issue.
Find out more about Non-destructive testing of rails and welds


